Contents
Purpose
How to share or unshare files within Team Drive
Reminder
When sharing a document, be mindful of FERPA Compliance as noted here FERPA for Faculty/Staff.
Sharing documents within a Team Drive to Non-UCSB Connect accounts that contain FERPA related information will be in violation of UCSB FERPA Compliance.
Requirements
- Member of the Team Drive with Contributor, Content Manager or Manager Permissions
- Team Drive Sharing Settings allow sharing (Refer to Team Drive Settings and speak with the Team Drive Manager with regards to Team Drive Sharing Settings)
Sharing
Directly to a User
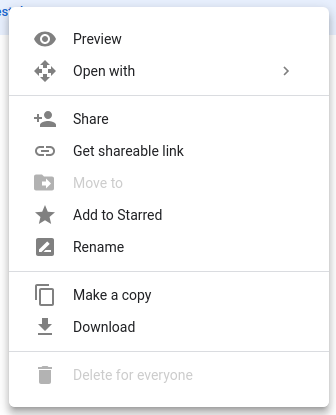
If you want to share a file to a user, you can right click on the file you wish to share
Click on Share
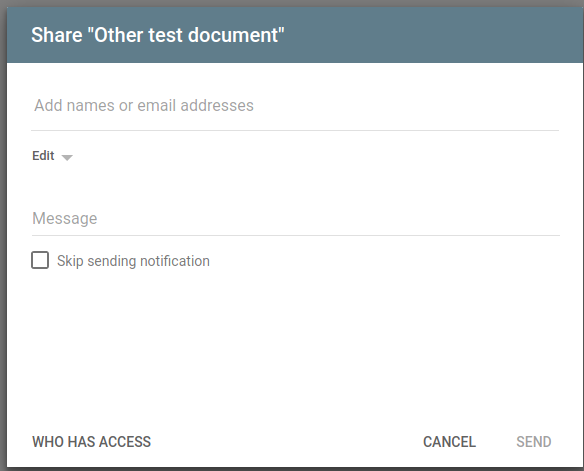
From here, you can put in the email of who you want to share the file with.
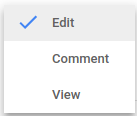
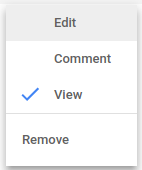
If you want to share the file in a specific way, you can do this by clicking on Edit, then select how you are sharing the file
- Edit - Allow user to edit the file
- Comment - Allow user to comment within the file (Works best with Google Docs, Sheets or Slides)
- View - View the document only
In the Message area, you can set a message that will be sent to the person you are sharing it with.
Check Skip sending notification if you don't want to have a notification sent to the person you are sharing.
Once you are ready to set this, click on SEND, and it will be shared.
If you are sending outside of UCSB, you may get a message saying:
Share outside of organization?
You are sharing to <email> who is not in the G Suite organization that this item belongs to.
CANCEL CONTINUE
Click on Continue if you are sure this is alright.
If the Team Drive Settings can be set to not allow this and will warn appropriately.
The document will show the following icon at the end to show that the document is shared
Sharing with a link
Sharing with a link is ideal for sharing a document to multiple people without having to invite them individually
To do this, right click on the document to get this menu:
Click on Get shareable link
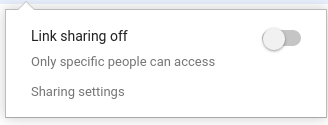
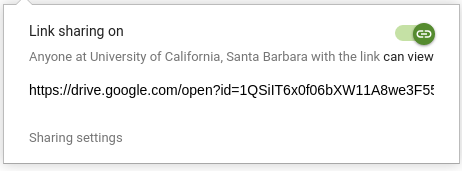
Click on the Slider to turn on Link Sharing
This will also copy the link into your computer's clipboard so you can paste it into an email or document to share.
If you want to fine tune how the link is shared, click on Sharing settings.
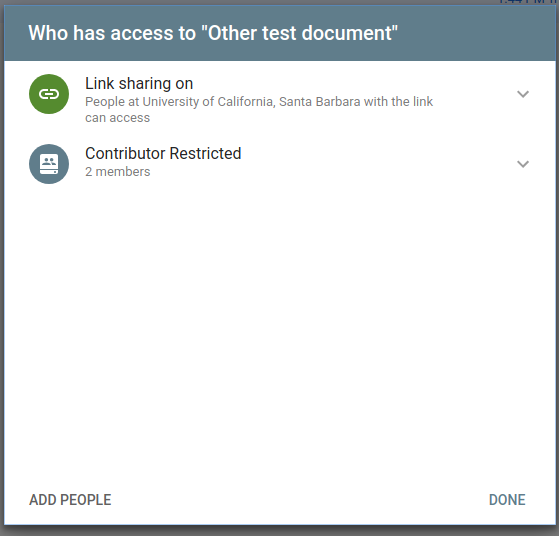
Click on WHO HAS ACCESS, which will show a window similar to this
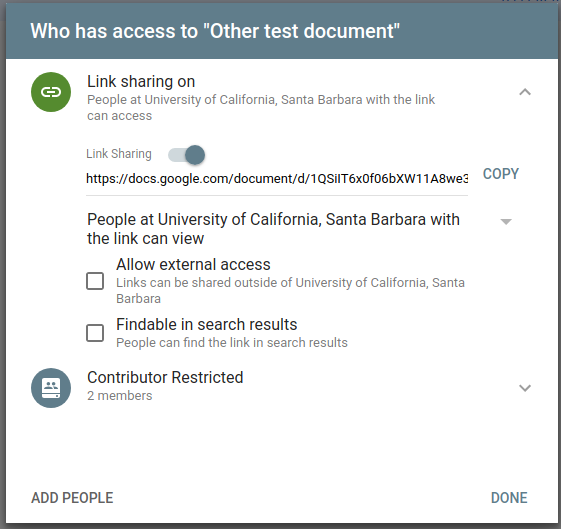
Clicking the V next to Link sharing on, you can fine tune how the link will work:
The first line is with regards to people with a UCSB Connect Account, where you can allow them to Edit, Comment, or View (This is default).
The check box next to Allow external access. If this is checked, the first line becomes permissions for how the file is shared to whoever has the link.
The Findable in search results should never be checked.
Once you are done with the sharing settings, click on DONE to finish the settings.
The document will show the following icon at the end to show that the document is shared
Unsharing
Unsharing a single person
If you wish to remove a person from the file being shared, right click on the document to get this menu
Click on Share...
Click on WHO HAS ACCESS...
Click on View next to the name of the user you wish to Remove the share and select Remove.
This will remove the share permissions to that person.
If there is more than one person, you will need to remove them individually.
Click on DONE to finish.
Turning off Link Sharing
To turn off link sharing, right click on the document to get this menu
Click on Get shareable link
Click on the green slider to make it go grey
The file is now no longer sharing with a link.
