Engineering Science Building 1003 (Cooper Lab) AV Instructions
Contents
How to use the Projector with the lectern Computer
This is a simple step-by-step guide on how to use the projector with the lectern computer
Turning on the Projector
The remote for the Projector should be on the lectern itself.
You will need to be in front of projector and pressing the RED button on the remote to turn on the projector.
Give the projector a couple of minutes to warm up.

Please do not use any other button on the remote other than the RED power button.
Using the input button on the remote will cause confusion for other users.
Switching the Projector to the lectern Computer Input
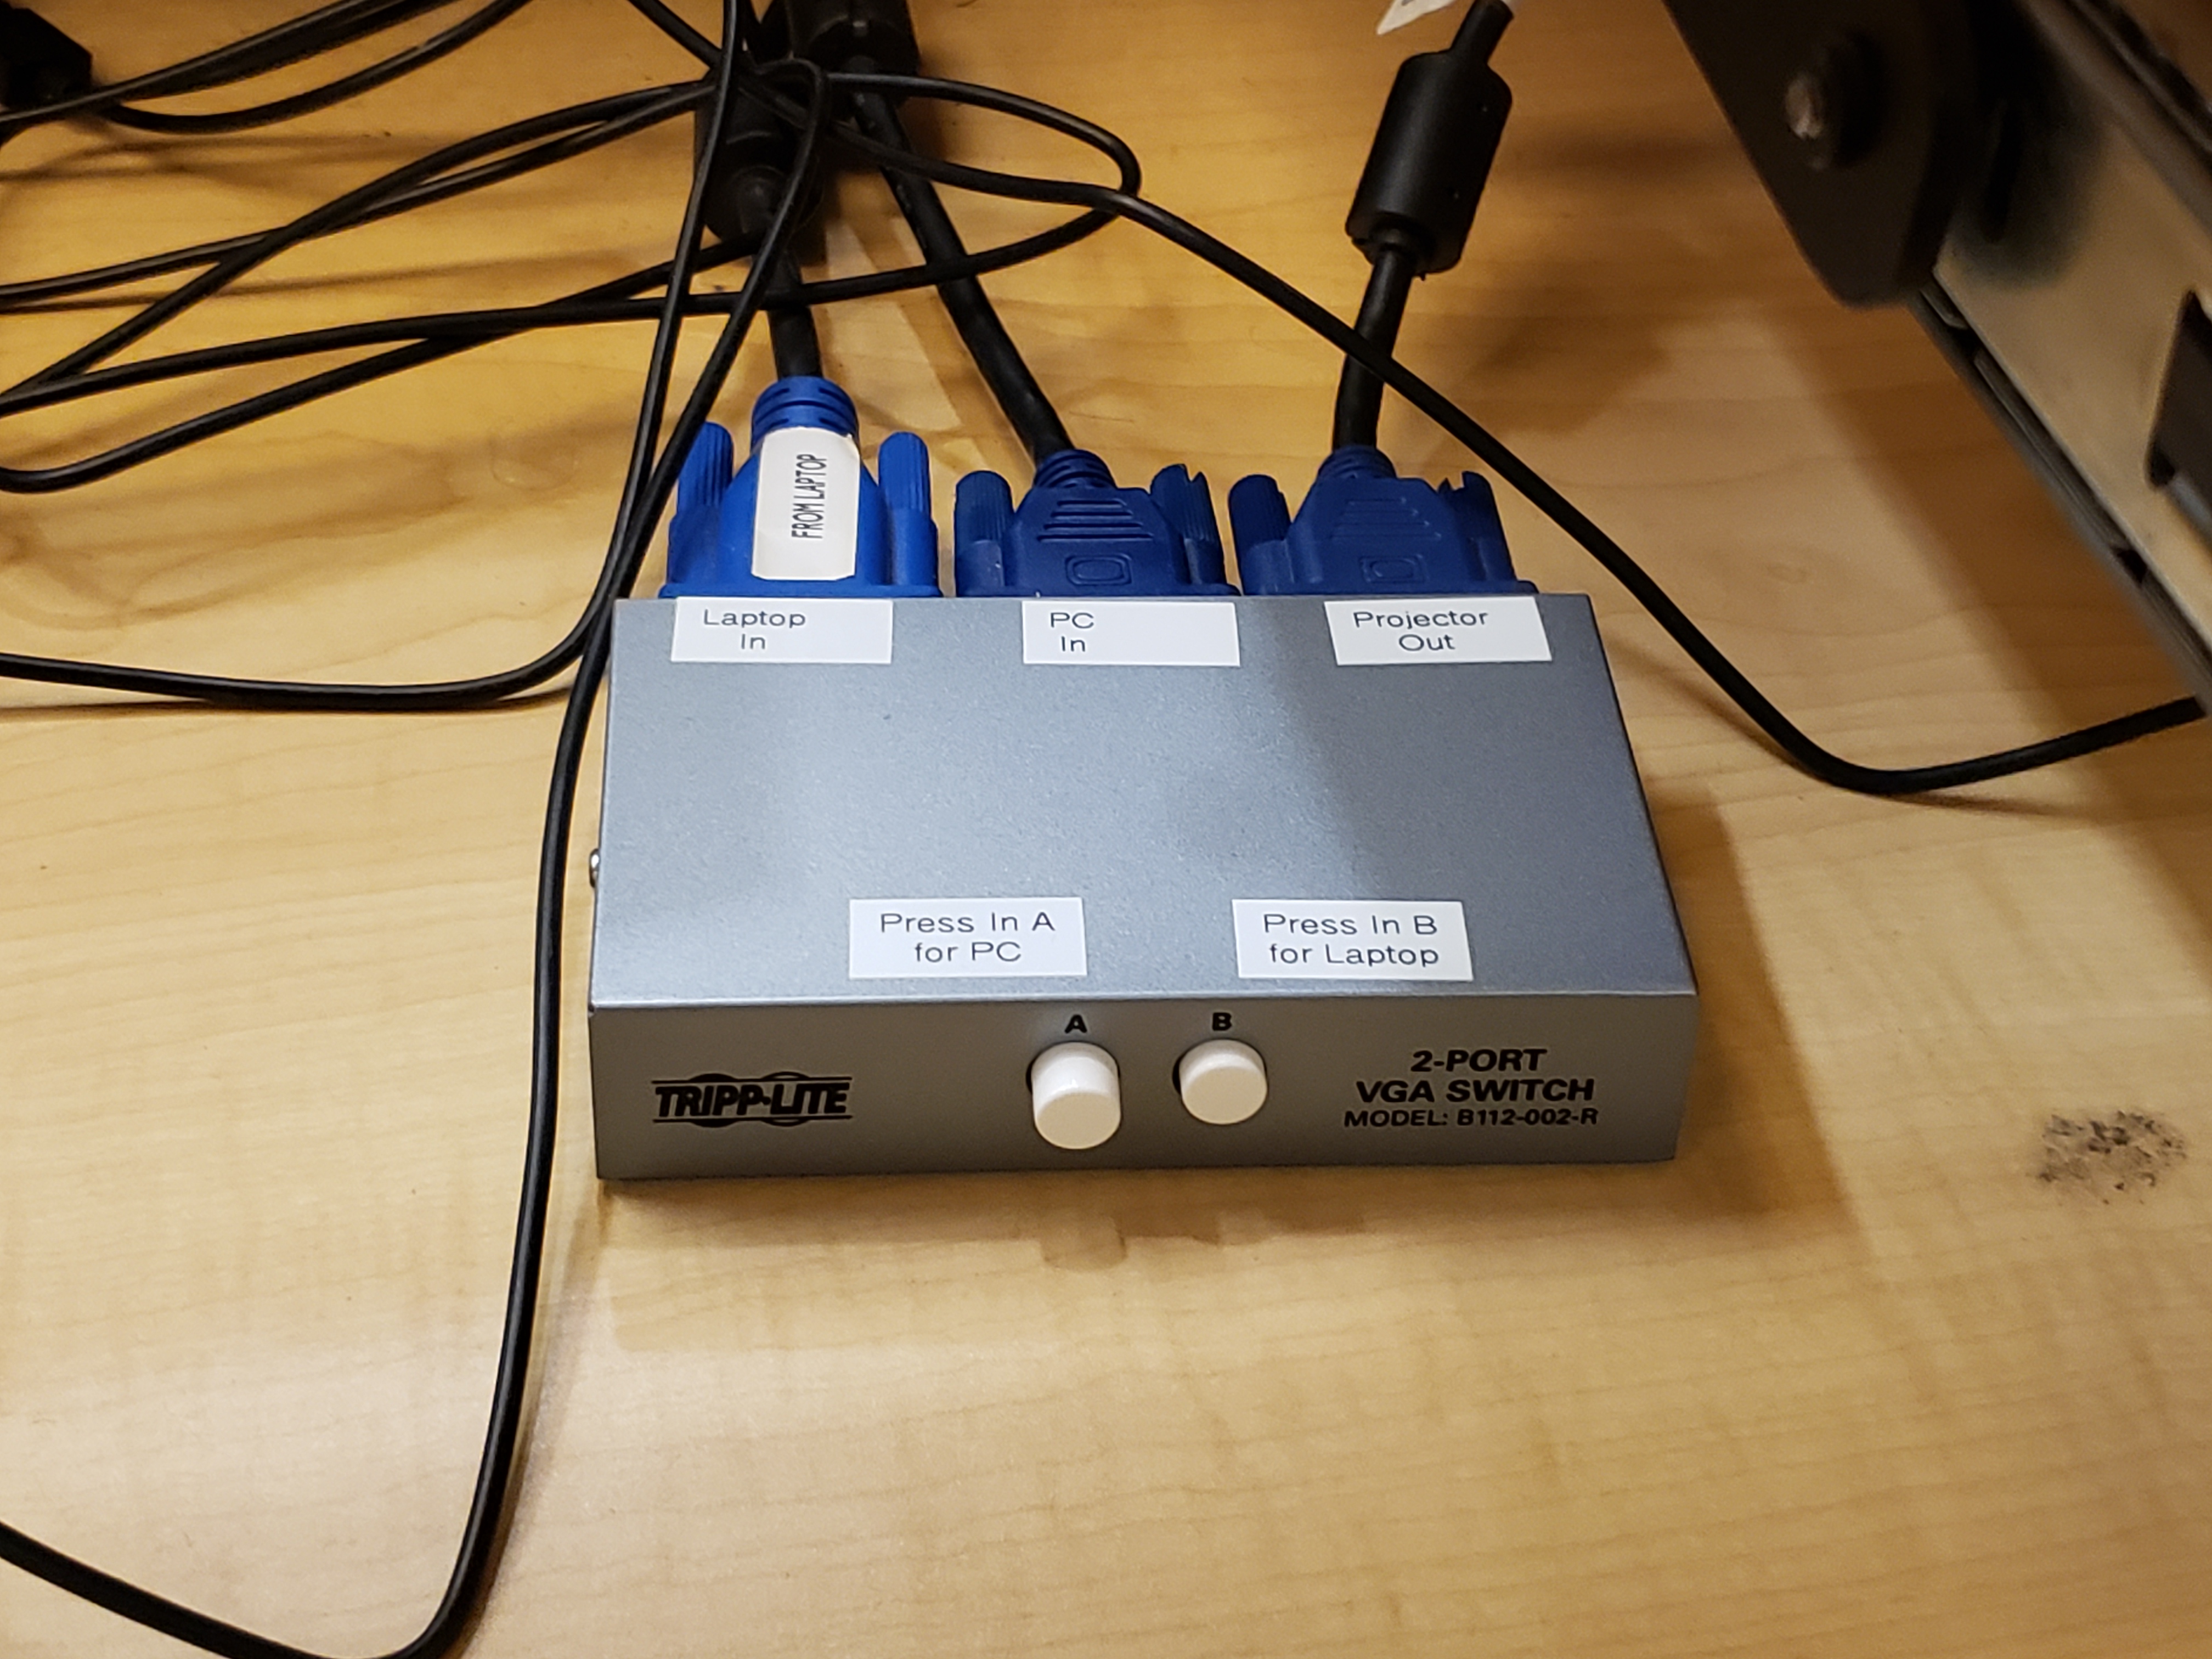
You will find this switch located under the keyboard/monitor area of the lectern.
This is not the one mounted on the right side of the lectern.
Press the A (Left) Button for the Lectern Computer
Turning off the Projector
You will need to stand in front of the projector and press the RED button on the remote.
On the screen, a window will show Power off?, press the RED button again to tell the projector to turn off.
How to use the Projector with a Laptop
This is a simple step-by-step guide on how to use the projector with a laptop
The projector connector only supports VGA connections and we do not provide the adapters at the lectern.
Please be sure to bring the appropriate connection for your laptop in order to make use of it.
Turning on the Projector
The remote for the Projector should be on the lectern itself.
You will need to be in front of projector and pressing the RED button on the remote to turn on the projector.
Give the projector a couple of minutes to warm up.
Switching the Projector to the Laptop Computer Input
You will find this switch located under the keyboard/monitor area of the lectern.
This is not the one mounted on the right side of the lectern.
Press the B (Right) button for the Laptop connection.
Connecting the Laptop to the Projector

Please use the provided VGA cable on the lectern to connect to your laptop.
Projecting from your Laptop to the Projector
Depending on the Laptop and/or Operating System, the connection to the projector should already have handled this.
If you are having problems seeing the image, you may want to Google Search on the following:
How to Mirror in Windows/Mac
In most cases, the Laptop will default to either an extended desktop or projector mode, which won't show what you see on the laptop to the projector or your laptop screen goes blank.
The other case can also be that the adapter may be bad.
Turning off the Projector
You will need to stand in front of the projector and press the RED button on the remote.
On the screen, the a window will show Power off?, press the RED button again to tell the projector to turn off.
How to use the Projector with Document Viewer
This is a simple step-by-step guide on how to use the projector with the Document Viewer
Turning on the Projector
The remote for the Projector should be on the lectern itself.
You will need to be in front of projector and pressing the RED button on the remote to turn on the projector.
Give the projector a couple of minutes to warm up.
Switching the Projector to the Laptop Computer Input
You will find this switch located under the keyboard/monitor area of the lectern.
This is not the one mounted on the right side of the lectern.
Press the B (right) button to have the projector on the Laptop connection.
Setting up the Document Viewer to the Projector
The Document Viewer is in the corner behind the lectern.

You will need to move this ontop of the lectern and connect the VGA cable to the RGB Out in the back and connect the power cable into the AC IN.
The power cable for the projector is plugged into the wall by the lectern (Looking from the back of the lectern, look to the lower left for a gray power cord)

Picture of how the Document Viewer should be connected
Once it is connected, turn on the Document Viewer using the Power switch

Document Viewer Controls

The Document Viewer controls are fairly straight forward but for the most part, you will only be using the following…
Zoom
Tele to Zoom in, Wide to Zoom out on the document on the viewer.
Image Rotation
The Image Rotation rotates the camera view of the document.
You will have to press this button to cycle through the 4 different positions the camera will take.
Lamp
There are three modes for the Lamp.
Upper – Turns on the lamps to brighten what is on the viewer.
Base – Puts backlighting for overlays or slides for easier viewing.
Off – Turns off the Document Viewer's lamps.
Turning off the Projector
You will need to stand in front of the projector and press the RED button on the remote.
On the screen, the a window will show Power off?, press the RED button again to tell the projector to turn off.
How to Print
The printer in the Cooper Lab is currently setup to have print jobs submitted via Papercut, so please use the computers in the Cooper Lab to print out.
The printer to print to is esbtl-ps1 and should be on the right side of the lab, close to the lectern.
Thermostat Timer

Location of the Thermostat Timer
In the back of the room, the thermostat timer that controls the air for the room is located.

The timer is set in hours, so please turn the dial to the number of hours you will be in the lab.
Lectern Sound
At the moment, the lectern computer is connected to an audio deck that is inside the lectern.

For the most part, the audio can be controlled by the volume sliders on the computer.
However, if it is still too quiet, you can use the audio deck's volume to boost it.
This setup is only for the lectern computer.
We do not have a convenient means to hook up laptops to the audio deck at this time.
Troubleshooting Sound Issues
Check Cabling

The cable connections next to the lectern
The cabling to the wall should be setup as pictured here. If this is not so, this may be a probable reason the sound is not working.
Speaker buttons on Audio Deck incorrect

Lower right corner of Audio Deck
In the lower right hand corner of the audio deck is a Speakers section.
The normal configuration should be:
1 - Pushed in
2 - Not pushed in
If this is not the case, please set it so.
Audio Deck isn’t on
The normal state of the Audio Deck should be on, showing CD on the display.
The power button is located in the lower left hand corner.
If it does not turn on, please contact help@engineering.ucsb.edu and inform them that the Audio Deck in the Cooper Lab’s Lectern is not working.
Audio Cable not connected to computer
There should be an audio cable connected to the GREEN connection of the computer in the back.
If not, please reconnect it and see if it works.
How to Contact ECI for Help
Please contact ECI for support at help@engineering.ucsb.edu or call 805-893-3221
We currently do not have on call support for this room.
We will respond as soon as we are available.
If you wish to have someone there for on-site support, please schedule the request a week in advance through help@engineering.ucsb.edu.